Using TikTok Pixel with Google Tag Manager on Shopify
If you're using Google Tag Manager and the TrackPixel.app to manage tags for your Shopify website, you can add your TikTok Pixel to your Google Tag Manager account to measure and optimize the results of your TikTok advertising on Shopfiy.
Follow these instructions to install the Google Tag Manager pixel on your Shopify store.
Installing TikTok Pixel Base Code
There are two methods for installing TikTok's Pixel Base Code.
Note: Please only use one of the methods.
Method A: Installing through Events Manager (Recommended)
Go to TikTok Events Manager > Set up Web Events > Automatically Set Up Web Events via Partner Platforms.
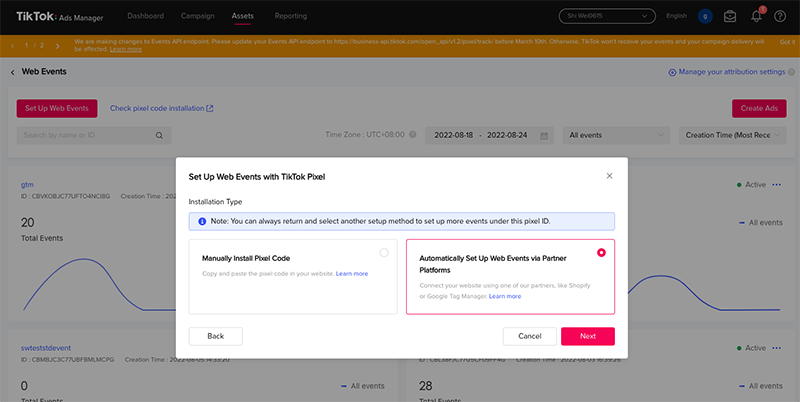
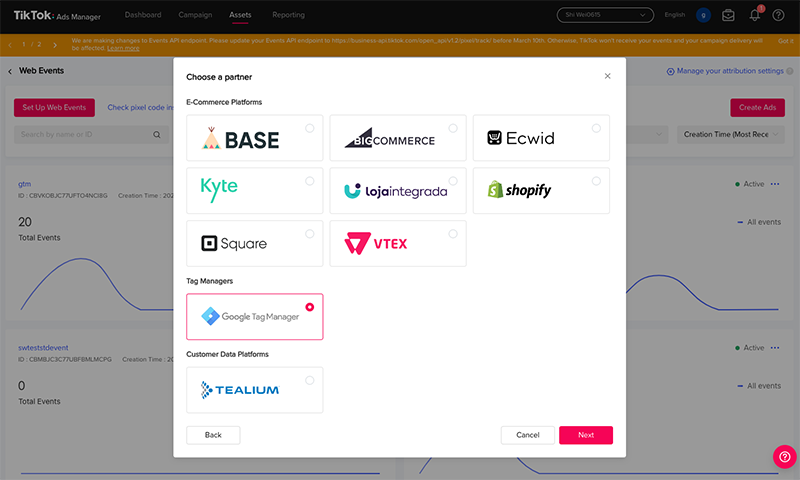
2. Select Google Tag Manager > Follow through the rest of the screens.
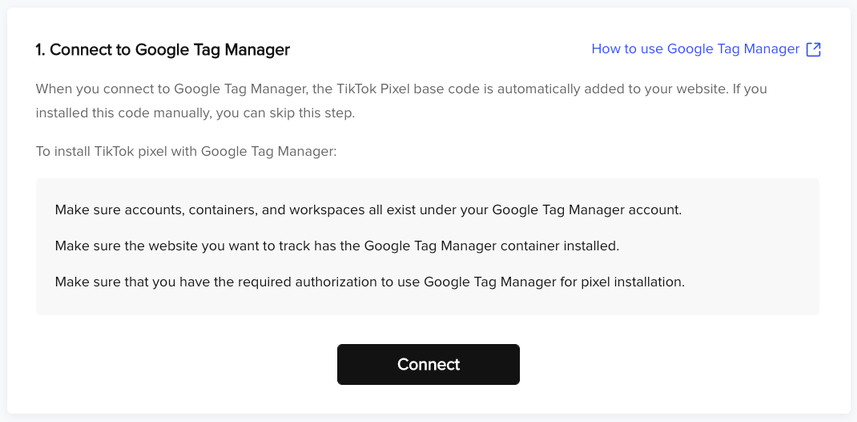
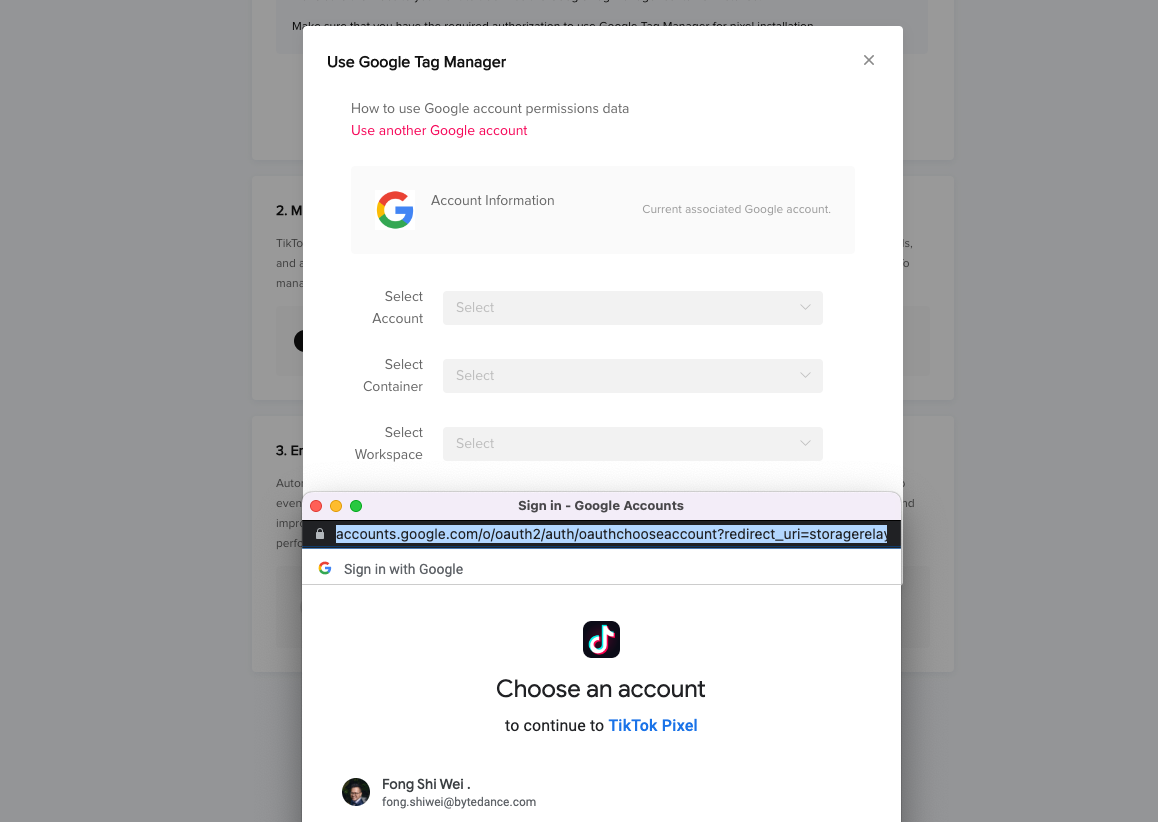
3. Follow the screens and log in to your Google account that is linked to your GTM workspace.
Log in to your Google Account by clicking on the Connect button.
Select the Container and Workspace that you wish to install the base code.
After you have installed the base code, you may visit our template in Google Tag Manager gallery by clicking on the link. Then, follow through the Creating TikTok Event Tags steps below.

Method B: Installing through Google Tag Manager
Adding TikTok's Client Side Template to Workspace
Login to your Google Tag Manager.
Navigate to Templates > Search Gallery and search for the TikTok Pixel template by TikTok.
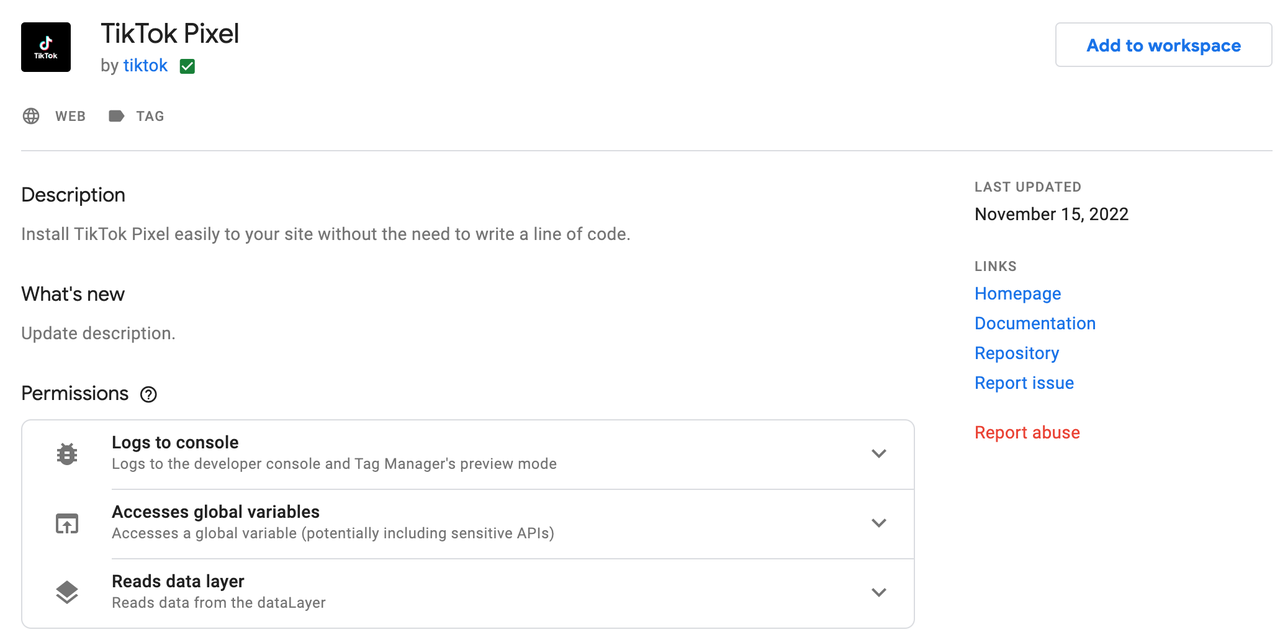
3. Select Add to workspace to import the template into your workspace.
4. Save and close the template editor.
Installing Base Code through Custom HTML
Copy your TikTok Pixel Base code from your Events Manager.
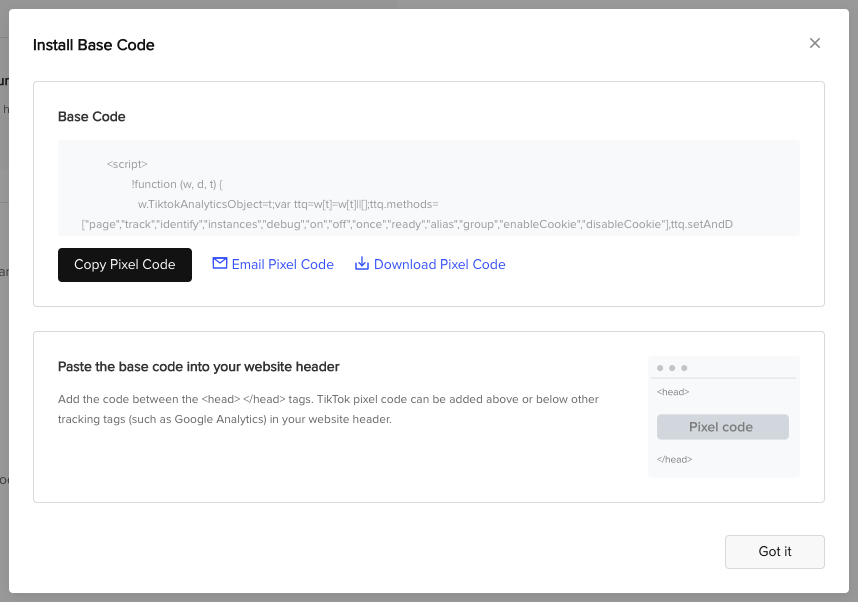
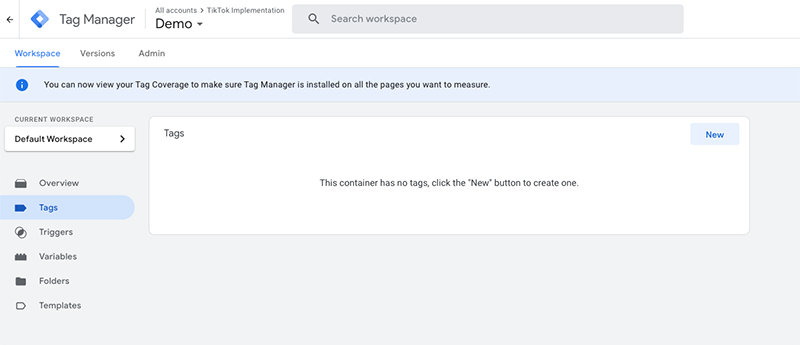
2. Go to your Workspace > Select Tags > Select New.
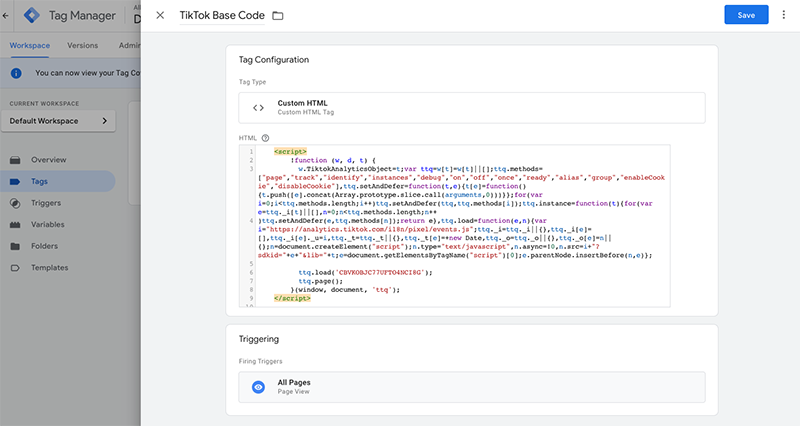
3. Name your tag (e.g. TikTok Pixel Base Code) > Click Tag Configuration > Select Custom HTML.
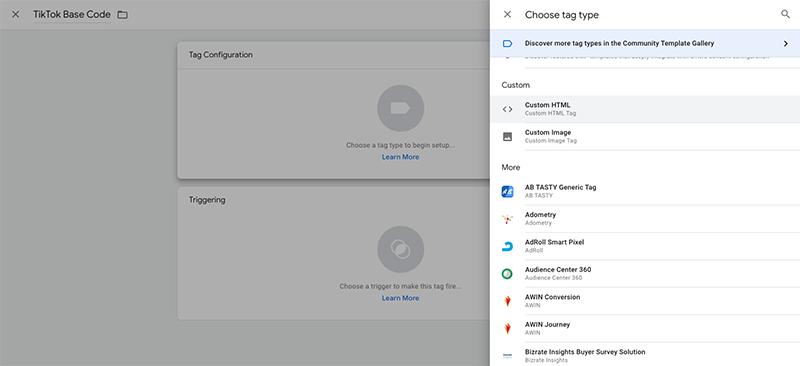
4. Copy the Pixel Base Code from TikTok and paste it in the HTML field > Set the trigger to All Pages.
Creating TikTok Event Tags
After installing the base code, you should plan to trigger any one of our TikTok 14 Events according to your user journey, simply follow the steps below. For every event you wish to create:
1. Go to your Workspace > Select Tags > Select New.
2. Give your Tag a name e.g. TikTok ViewContent > Select the template you have just imported (TikTok Pixel).
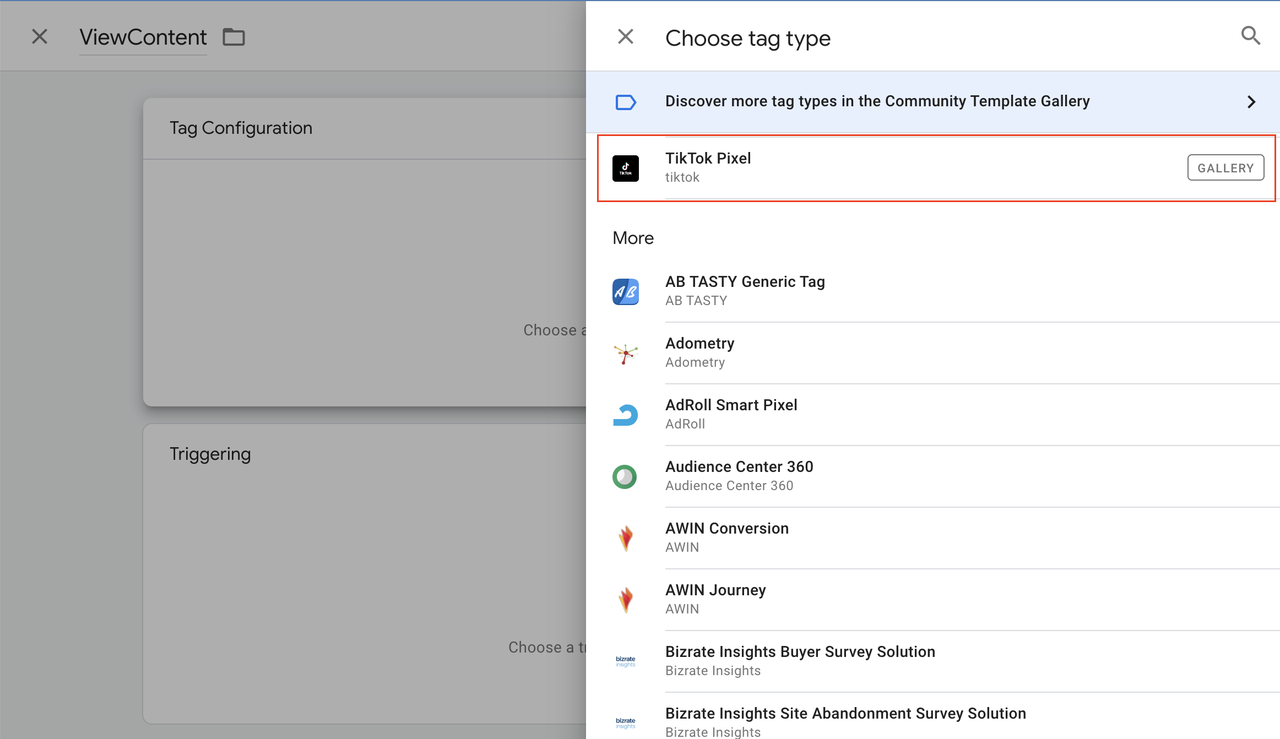
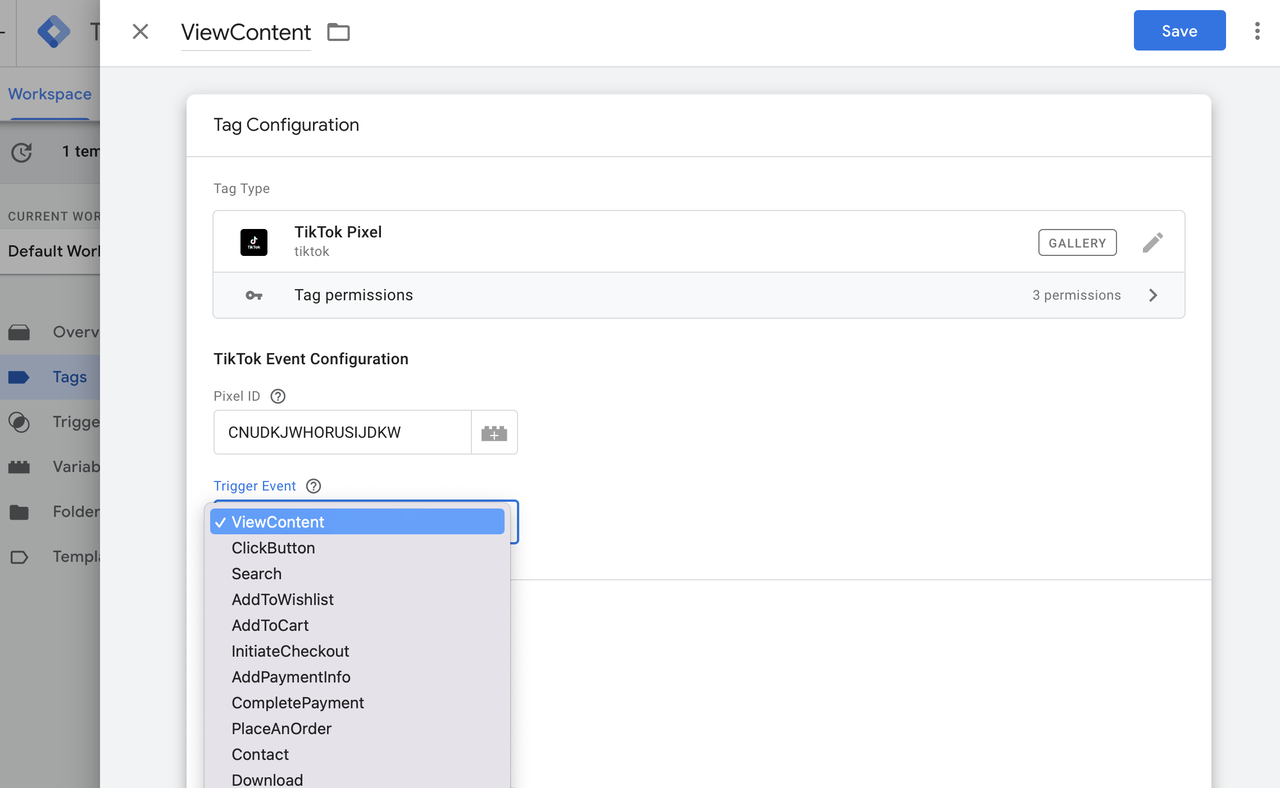
3. You should then be able to choose from the 14 events you wish to trigger.
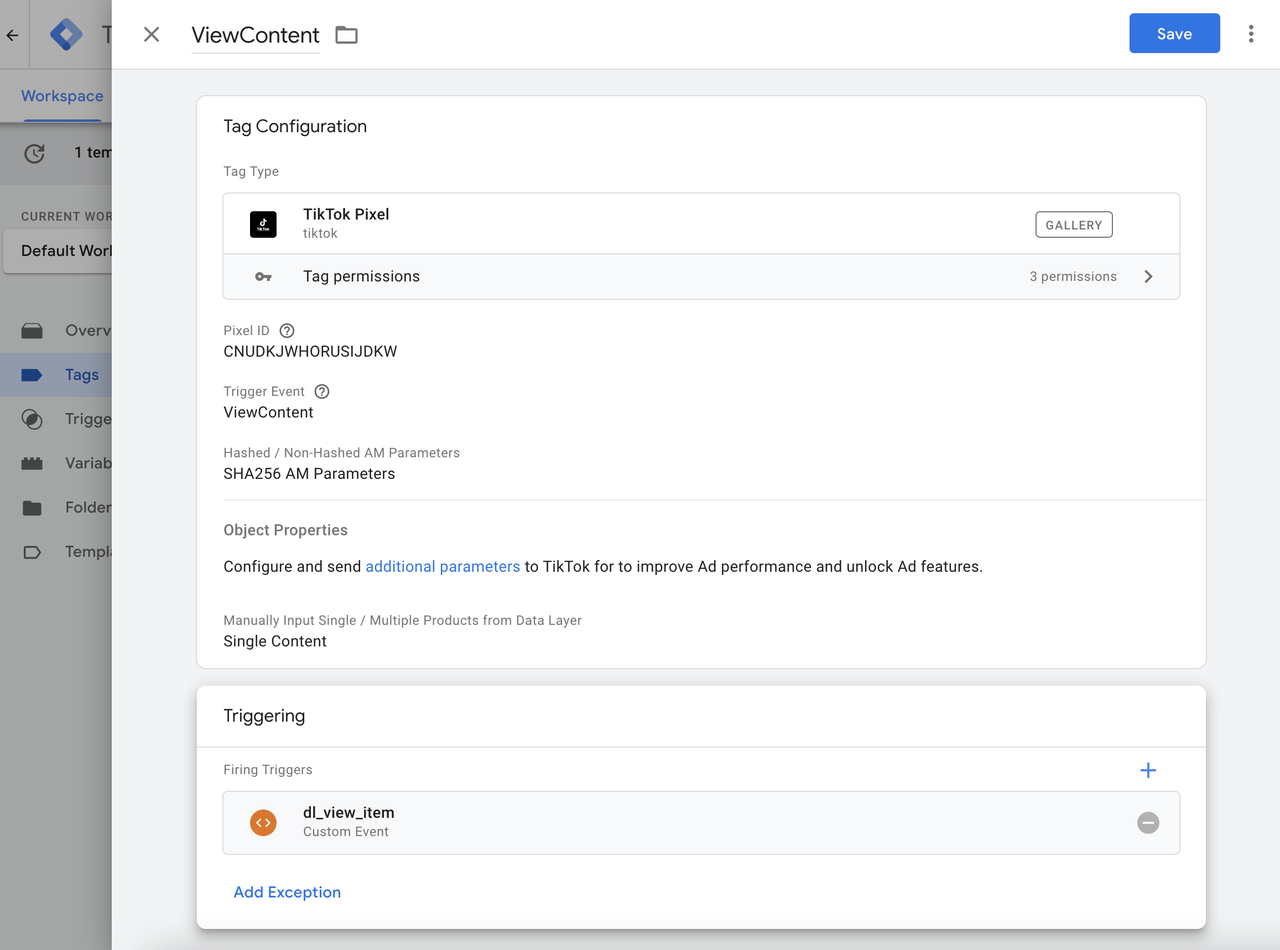
4. Finally, set a Trigger of your choice. For consistency, it is recommended to select the Google Tag Manager custom event you are invoking on your page. Then, save your tag.
Enable Advanced Matching
Advanced Matching is available via TikTok Business Tools to enable businesses to send privacy-safe customer information to better match website events with ads on TikTok. We recommend passing hashed emails and phone numbers for web events from your Data Layer to increase the efficacy of ad performance and attribution on TikTok. Learn more.
1. Edit the tag you created and choose between passing in SHA256 hashed email / SHA256 hashed phone or simply just the plain email / phone
Note: You can do so by typing{{ and selecting the available variables.
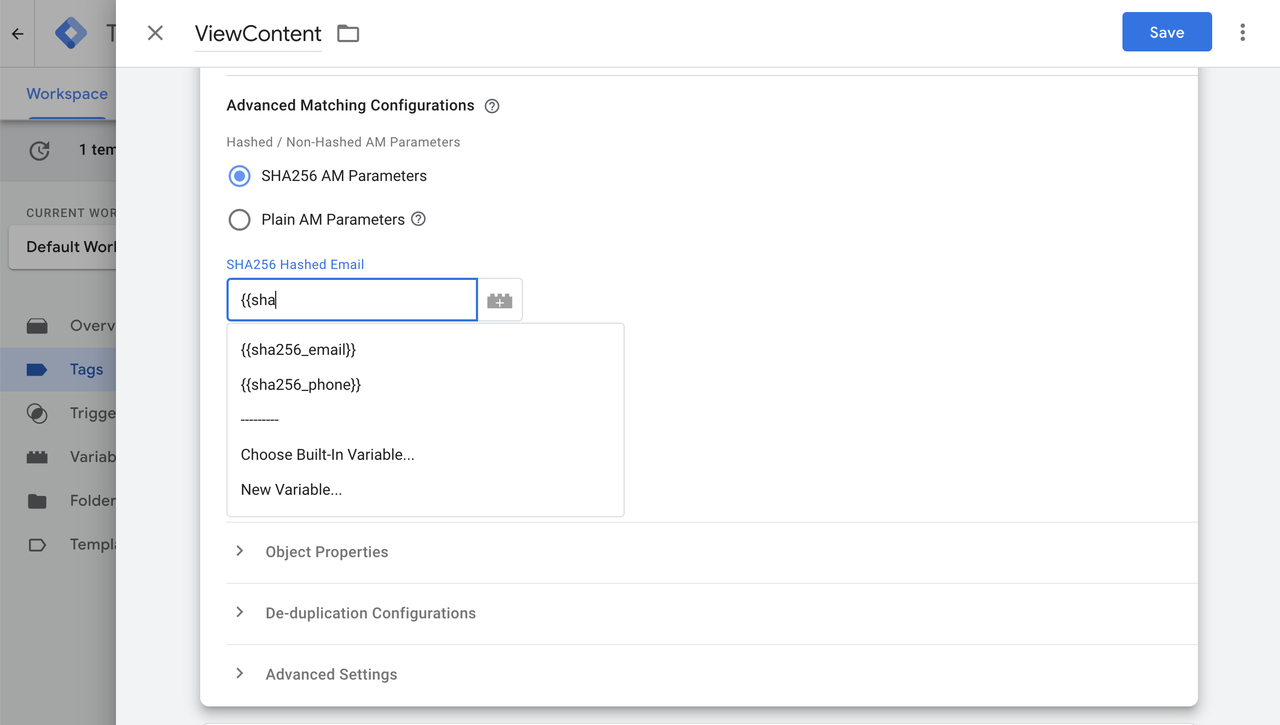
2. After setting up the variables, click Save your tag.
Enable Enhanced / Standard Ecommerce Heavy-Lifting
If you have enabled Google's Enhanced Ecommerce or Standard Ecommerce to track online shopping events in your Google Analytics, you can leverage the ecommerce Data Layers to pass additional parameters to TikTok, to enable products such as Return on Ad Spend (ROAS), Dynamic Showcase Ads (DSA), and Value-Based Optimization (VBO). Learn more.
1. Edit the tag you created above.
2. Under Parameters Configuration > Check on the Use Google Analytics E-commerce Data Layers selection.
3. Select either Enhanced Ecommerce or Standard Ecommerce.
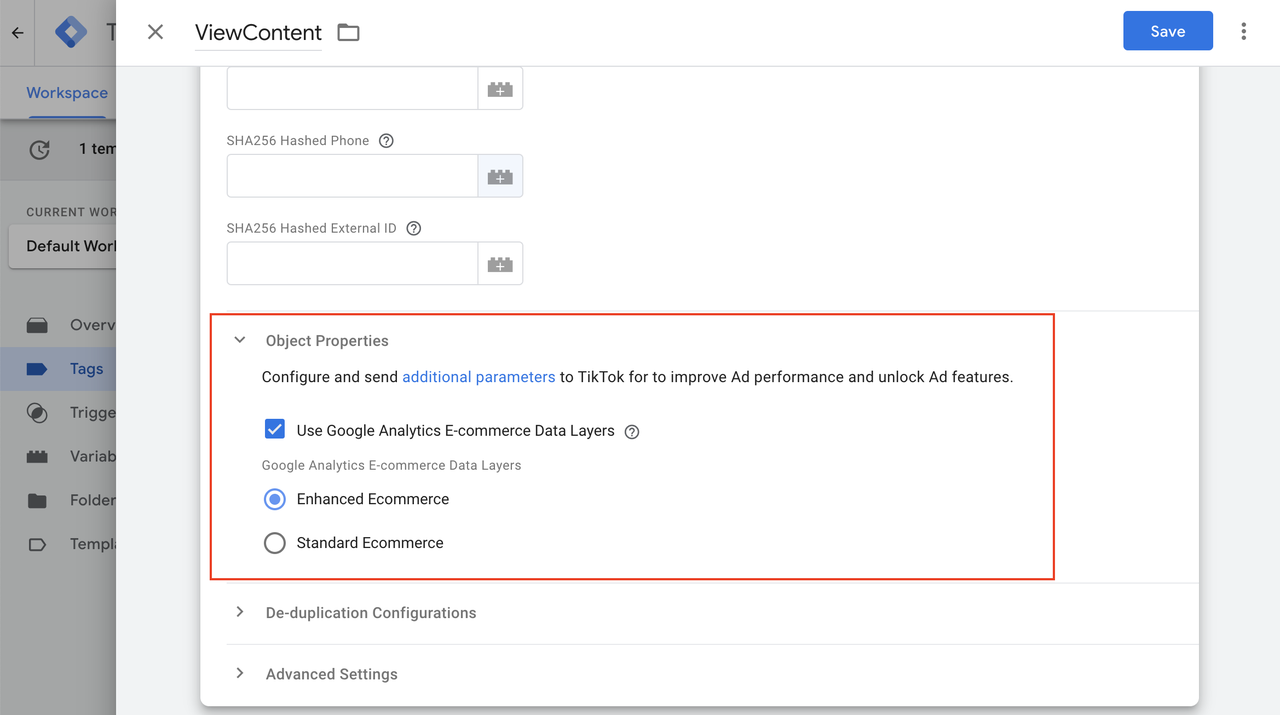
4. Select the correct triggers that are firing your Enhanced Ecommerce events.
5. You may simply navigate to your website > inspect element (F12) > type in dataLayer in the console > find the Enhanced / Standard Ecommerce events which usually have the product details and check the event value.
6. The event value should be your custom event trigger.
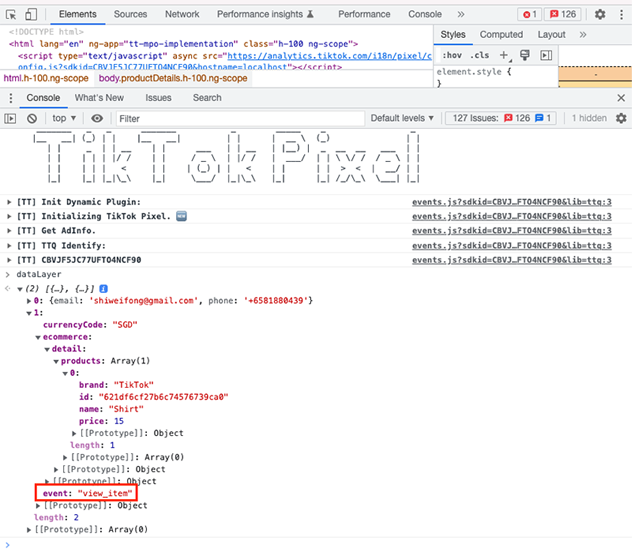
7. Save your tag.
Enable Additional Parameters
If you are not using any Google Enhanced Ecommerce of Standard Ecommerce, you may pass additional parameters back to TikTok using Data Layers.Please refer to TikTok documentation for more details on parameters.
Option 1: No Items
This option is for advertisers who are not hosting e-commerce websites.
1. Select No Contents if you are not planning to send any parameters from your event.
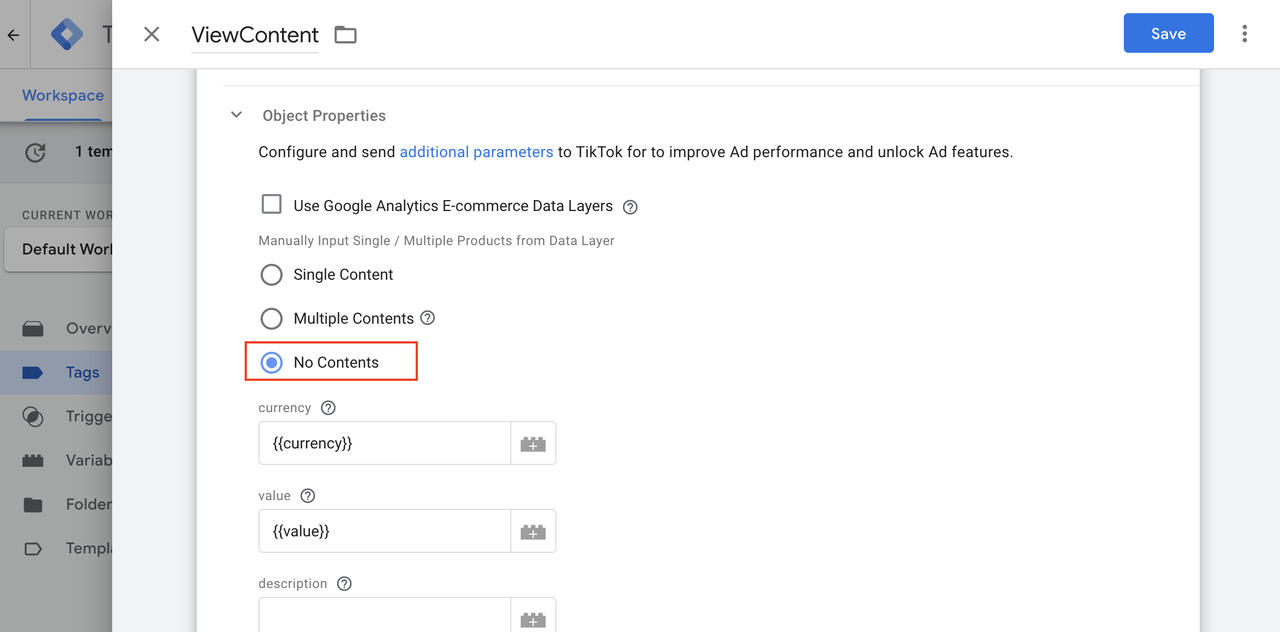
2. Pass value and currency if you are planning to measure Total Value in your TikTok Reporting by passing them from the Data Layer variable that contains those values.
3. Save your tag.
Option 2: Parameters for Single Item
This option is for advertisers whose events are typically for a single product. See examples of Single Content events:
A user viewing a page with a single item.
A user adding a single item to the cart but with multiple quantities.
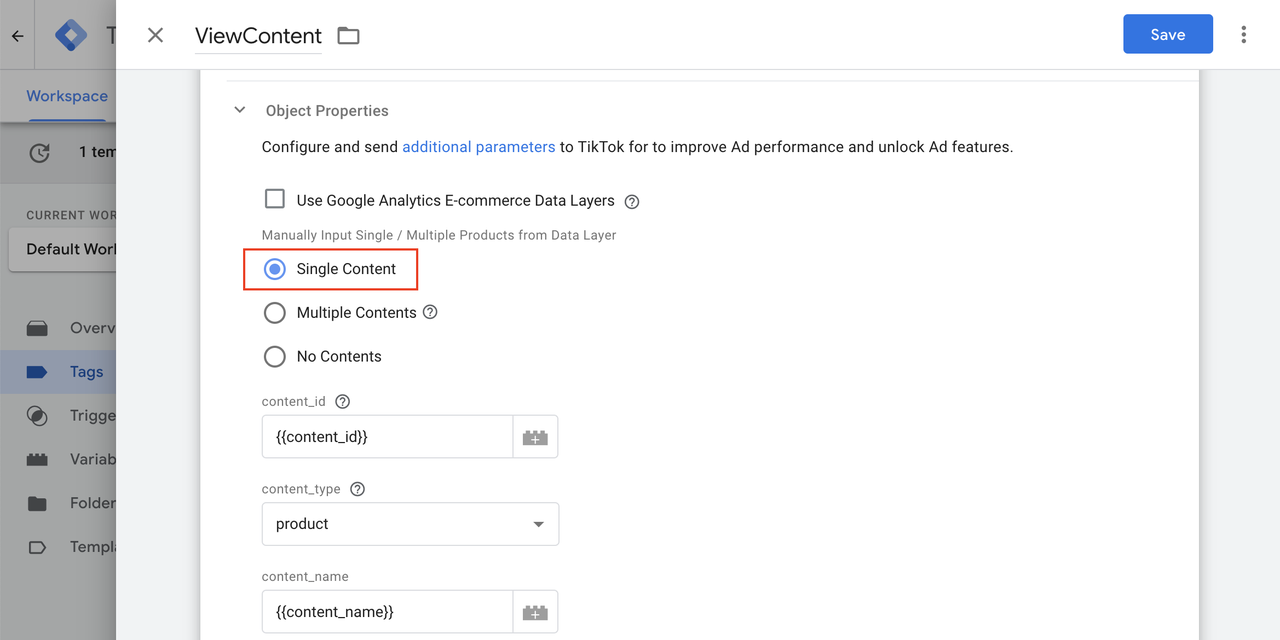
1. Map the fields accordingly to your Data Layer variables. See example mapping:
TikTok Content Field | Your Data Layer |
content_id | SKU ID |
content_name | Product Name |
content_type | product |
price | price |
quantity | quantity |
value | value |
currency | currency |
2. If you have uploaded catalogs to TikTok Catalog Manager, you should be aware that your products will have SKU ID and Item Group ID. Below is a mapping table of what you may use. If your content_id represents 1 product, use product, else if your content_id represents a group of products, use product_group
content_id | content_type |
SKU ID | product |
item_group_id | product_group |
3. Then, save your tag.
Option 3: Parameters for Multiple Items
This option is for advertisers whose events are typically for multiple products. See examples of Multiple Contents events:
A user checking out multiple items from the cart
A user completes the payment for multiple items
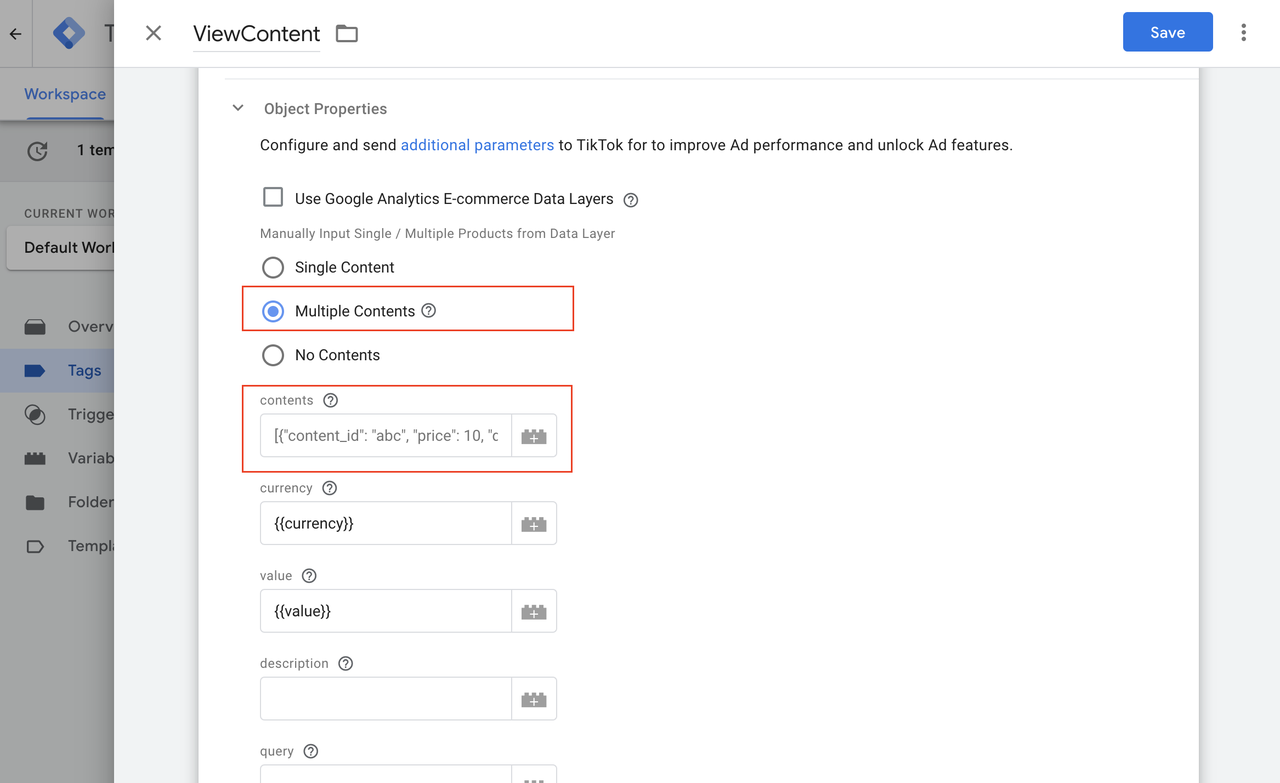
1. For multiple contents, you or your website developers will be required to generate a multiple content structure and add it to your dataLayer. See contents data layer items structure example:
// contents
[
{
content_id: 'SKU 1',
content_name: 'product name 1',
content_type: 'product',
quantity: 1,
price: 10
},
{
content_id: 'SKU 2',
content_name: 'product name 2',
content_type: 'product',
quantity: 2,
price: 30
},
{
content_id: 'SKU 3',
content_name: 'product name 3',
content_type: 'product',
quantity: 1,
price: 50
}
]
2. Select the dataLayer in the contents field.
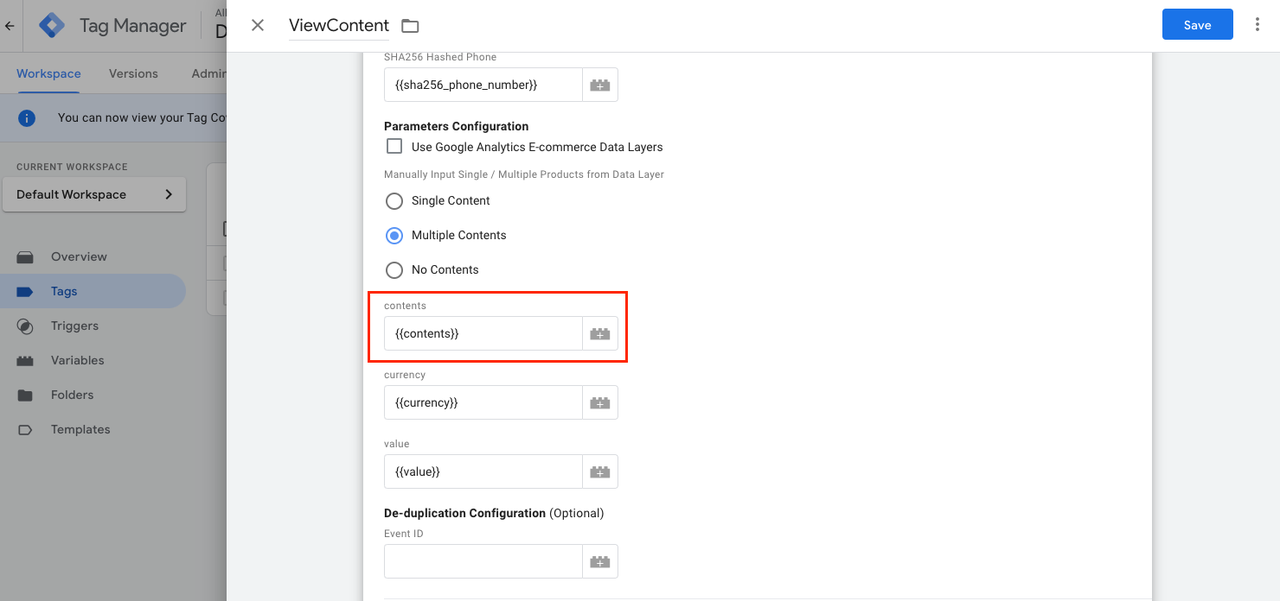
3. Save your tag.
Migrate from an Older Version
From Events Builder to Google Tag Manager Template
Read this only if you previously implemented the TikTok Pixel Events Builder in Google Tag Manager.
Migrating from TikTok Pixel Events Builder to use our Google Tag Manager Template means you are completely switching to TikTok Pixel Custom Code.If you have already set up TikTok Pixel Events Builder in Google Tag Manager, you should already have the base code installed in Google Tag Manager while having triggers set up via CSS selector or URL in TikTok Events Manager.
Ensure that you have the template installed in your Google Tag Manager in Step 1.
Follow Step 2 to create Event Tags and set up parameters, advanced matching, etc.
Delete the Events Builder in TikTok Ads Manager as a best practice to prevent duplicate of events.
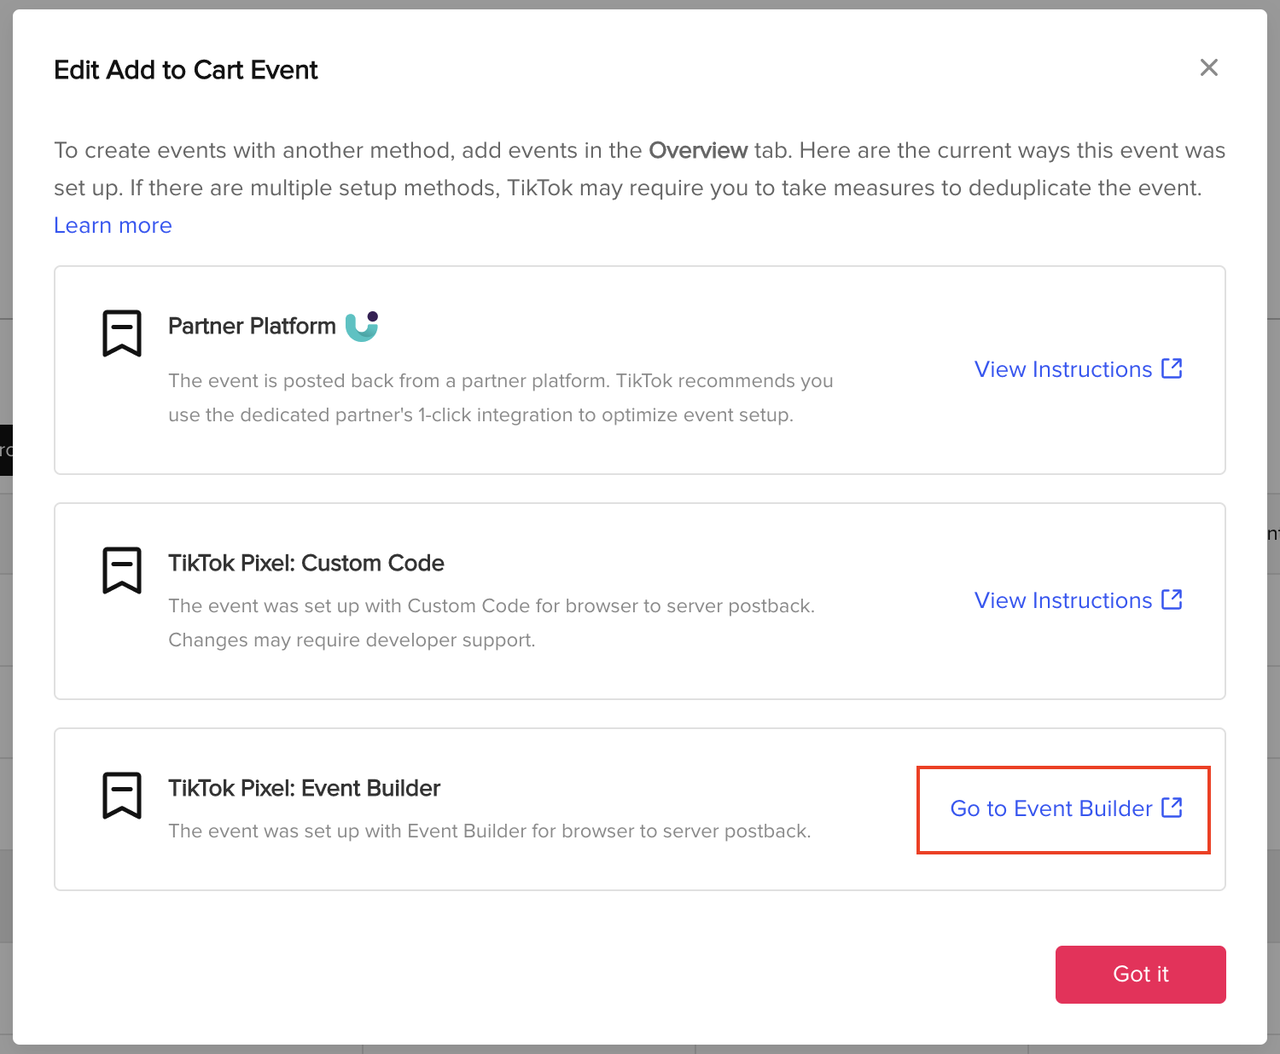
Go to your events manager and Edit your event.
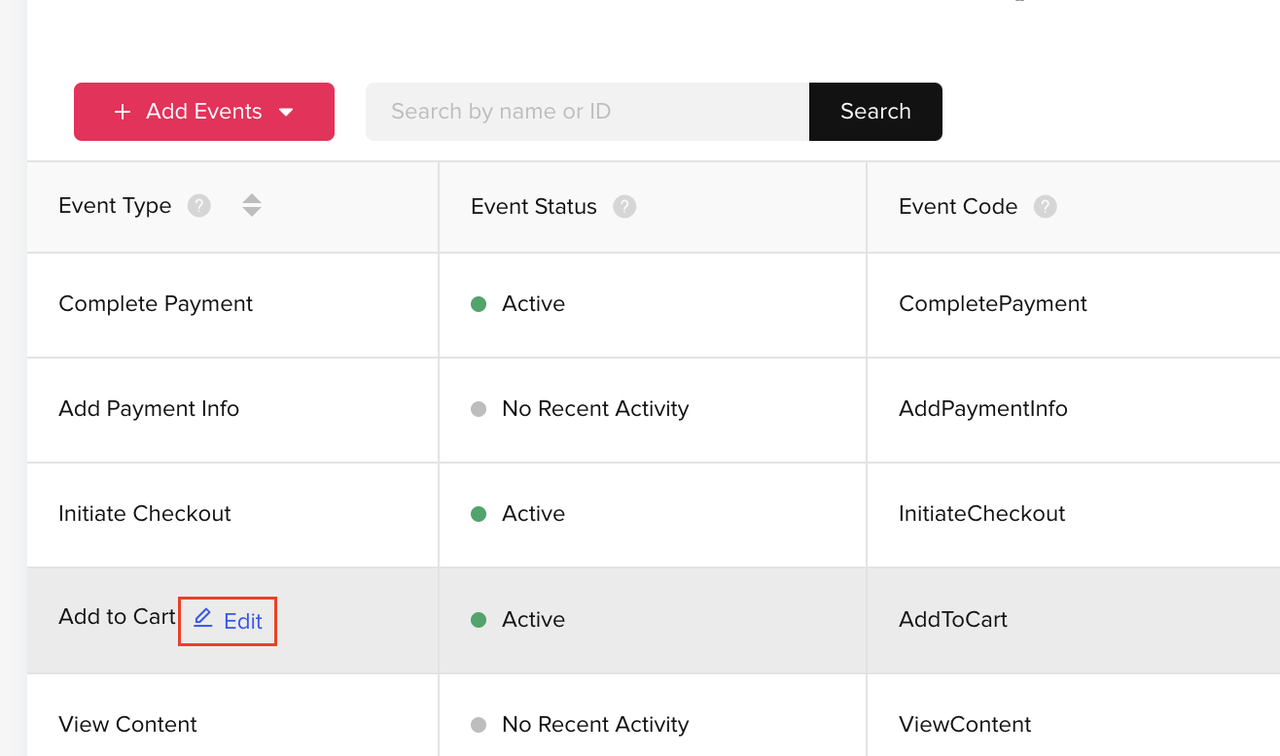
As you are now contributing to AddToCart via Custom Code via Google Tag Manager and Events Builder - please remove Events Builder events by first going to Events Builder.
Subsequently, delete the Event from events builder by clicking on the trash button.
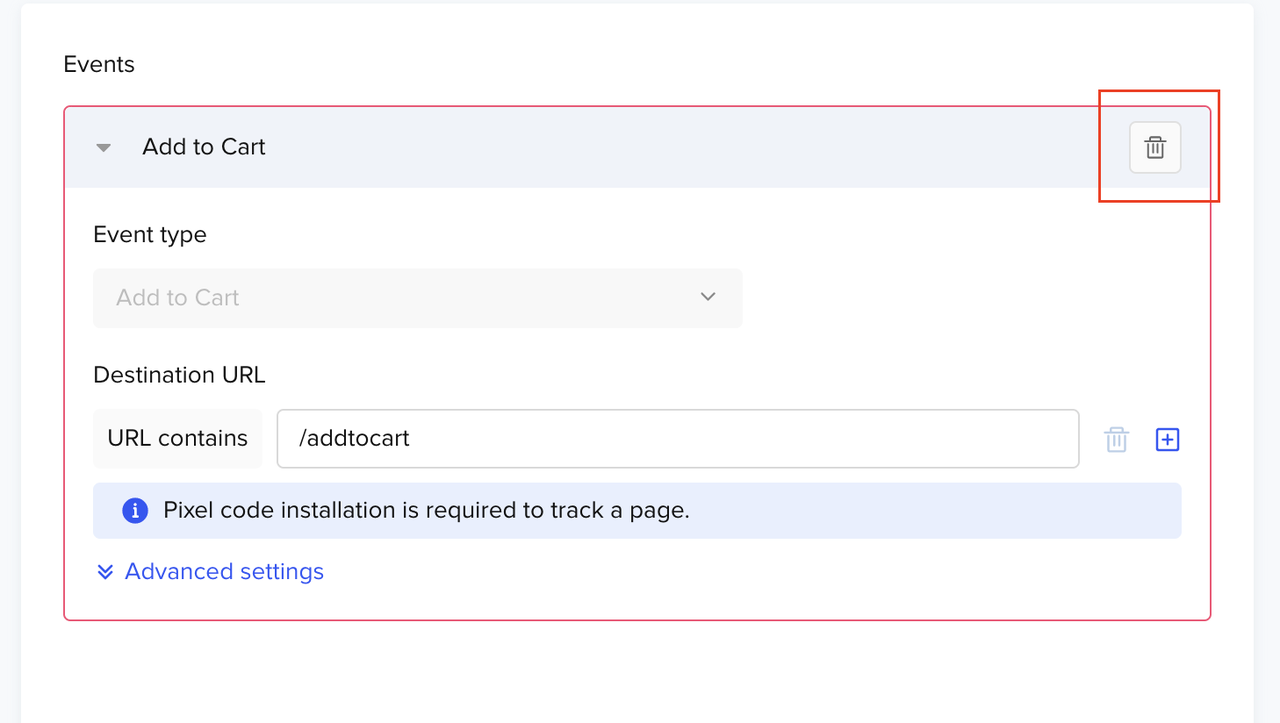
Repeat and delete all the Events Builder events.
From Custom Code to Google Tag Manager Template
Read this only if you previously implemented TikTok Pixel Custom Code via Google Tag Manager Custom HTML Tag.
1. Make sure you have followed Step 1 to add our Google Tag Manager Template to your workspace.
2. If you have already installed TikTok Pixel Base Code in your Google Tag Manager Custom HTML tag > Select Edit after opening up your Custom HTML tag.
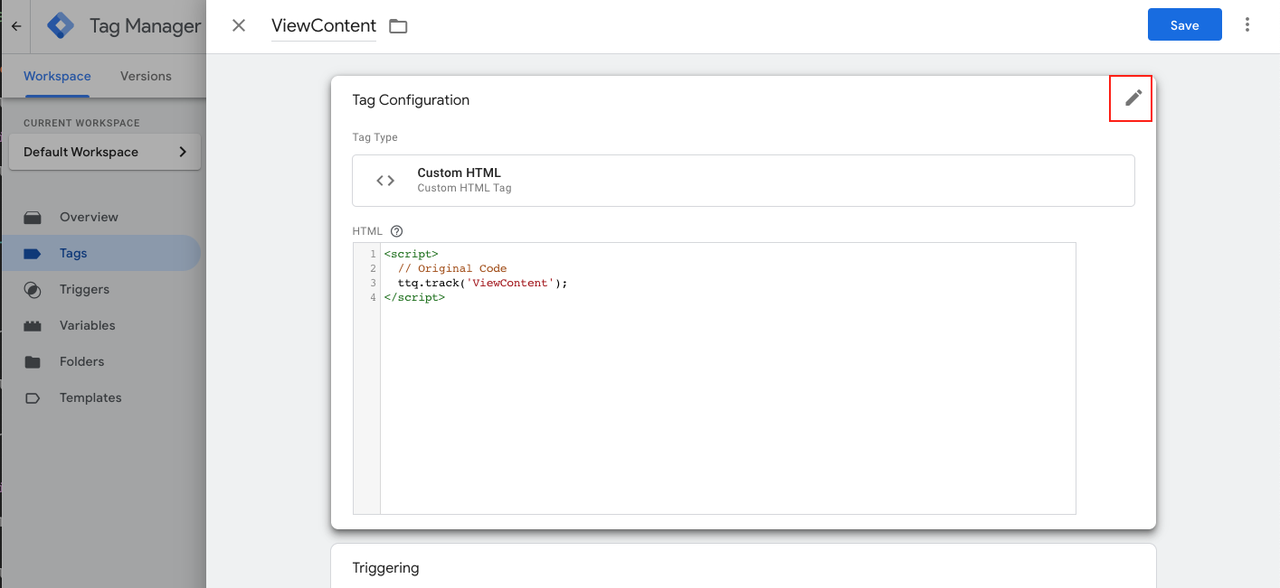
3. Replace your Custom HTML tag with the installed template and follow Step 3 to set up parameters, advanced matching, etc.
4. Save, preview, and publish your events.
Common Troubleshooting Errors
Error Messages
You don't have a GTM account, Unable to find container, Unable to find workspace: Make sure you have not deleted the account and workspace in your Google Tag Manager. If your account list is null and you have deleted the default container as well, you will get one of these error messages.
Unable to find account: If the path of the first account in your list is null, then you will get this error message.
Pixel binding GTM failed: Make sure you are not installing a pixel which has already been connected to your GTM account, otherwise you will get this error message. Please check your Google Tag Manager account to confirm whether the pixel has been installed prior (repeated installation of pixels may result in repeated event data recorded).
Other Issues
No data appearing in Events Manager: Even though you have connected the TikTok Pixel to your Google Tag Manager successfully, if the container you chose has not been installed onto your landing page correctly, the TikTok Pixel will not record data properly.
Events not created: While events will pre-populate upon creation of the pixel, events must be defined before anything starts tracking.
Find more information on this page: https://ads.tiktok.com/help/article/get-started-google-tag-manager?redirected=1